
Md.Habibur Rahman
June 15, 2020
GitHub For Babies- Part 2
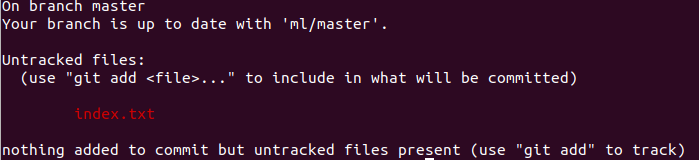
Welcome back to Part 2 of the GitHub series. Now, we create a text file named index.txt and add a line in the text file for example print(“hello!”). Now perform the previous command again:
git status
After this command, It will display some message stating untracked files meaning that some changes have been made to this folder which is not tracked by git yet and it is red marked.
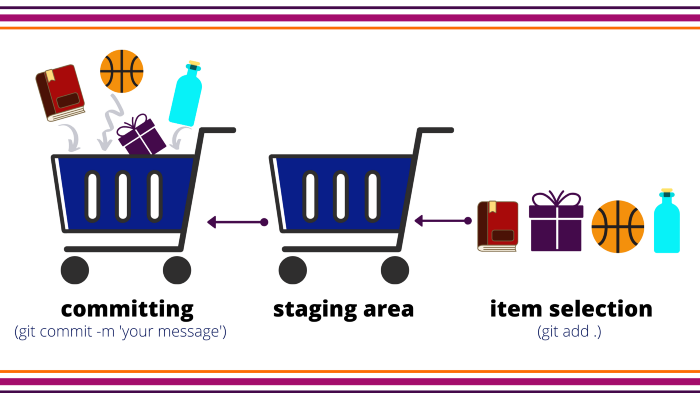
Now, we have to upload our updated work to the GitHub online repository. Before that, We have to understand some concepts.Imagine you are in a super shop where you have to choose the items you like by visiting rows and put the items in the cart. Then finally you have to come back to the counter and pay the price. The cart used here can be called a staging area in comparison to the GitHub concept. Anything you want to pick for buying has to put it in the cart and then you can pay to the counter. Similarly, any file you changed needs to be put in the cart or staging area before you upload it in the GitHub repository. The concept of putting things in the staging area or cart is called Commit and before putting things in the cart you need to choose and choosing the item or file which is called add in terms of git.
So, we can say there are 3 prerequisites to upload a file to a GitHub remote repository —1. Initialize (.git folder) first.
2. Adding the files to the cart(staging area) and
3. Uploading(pushing) the file to a remote repository
As we cloned the repository so, it has been already initialized. The next thing we need to do is choosing the file. We have only one file to choose this time but if we have multiple files and want to add all those at a time we can follow the below command:
git add .
Now that we’ve added(selected) the specific files where the update took place next we have to put the selected item(file) into cart(staging area) which is called commit.The command is given below:
git commit -m “new line added”
Here, the text within the quotes will be anything related to the work that has been done which helps the user and teammates to understand the changes.The final step is to upload our work to the GitHub online repository. To do this, the command is:
git push
Here, push is the word similar to upload. After this command, if we refresh our GitHub page, we will see a full copy uploaded to the online repository.That’s all for today. Thanks for being with me. You can head over to Part 3 of this series.P.S- Cover Image credit goes to Unsplash
comments powered by Disqus